
Giving your old wood furniture a fresh and modern look is easier than you think. In this step-by-step guide, I will walk you through the process of refinishing wood furniture with paint. By following these instructions, you can transform your tired pieces into stunning focal points in your home.
Key Takeaways:
- Refinishing wood furniture with paint can give it a fresh and modern look.
- Gather all the necessary materials before starting the process.
- Proper preparation, priming, and painting techniques are essential for a flawless finish.
- Applying a sealant will protect and enhance the longevity of the painted surface.
- Take your time, follow the steps, and avoid common mistakes for professional-looking results.
Materials Needed for Refinishing Wood Furniture
Refinishing a wooden piece of furniture can breathe new life into an old and worn-out piece. With a few essential materials, you can transform your furniture using painting techniques for furniture refinishing. Here are the materials you’ll need to get started:
- A screwdriver – for removing any existing hardware
- A plastic bag – to store the removed hardware
- A drop cloth – to protect the surrounding area
- A palm sander – for sanding the furniture
- Sandpaper – in various grits for different stages of sanding
- Anti-vibration gloves – to protect your hands during sanding
- A tack cloth – for removing dust and debris
- Primer – to prepare the surface for paint
- Paint – in the color of your choice
- A paintbrush – for applying the paint
- A sealant – to protect the finished surface
Choosing the right type of paint and finish is crucial for achieving the desired look and durability. Consider the style and function of the furniture when selecting your materials. With these essential materials in hand, you’re ready to embark on your DIY furniture refinishing project.
Tips for Preparing the Furniture for Painting
When it comes to refinishing wood furniture with paint, preparing the surface properly is crucial to achieving a professional finish. Here are some essential tips to help you prepare your furniture for painting:
- Remove any existing hardware: Before you begin painting, take the time to remove any knobs, handles, or other hardware from the furniture. This will make it easier to paint and ensure a clean and consistent finish. Place the hardware in a plastic bag to keep track of it and prevent any loss.
- Disassemble if necessary: If your furniture has drawers or detachable parts, consider removing them before painting. Painting each piece individually will allow for better coverage and ensure that no areas are missed. It will also make it easier to access tight corners and edges.
- Protect the surrounding area: Lay down a drop cloth or plastic sheeting to protect the floor or work surface from paint drips or spills. This will simplify the cleanup process and prevent accidental damage to other items in the vicinity.
- Smooth the surface: Use a palm sander or sandpaper to remove any existing finish or imperfections on the furniture surface. This will create a smooth canvas for the paint to adhere to and result in a more professional-looking finish. Use sandpaper with a grit appropriate for your furniture’s condition and start with a coarser grit before moving to a finer grit for a smoother surface.
By following these tips, you can ensure that your furniture is properly prepared for painting, setting the stage for a successful refinishing project.
| Preparation Tips: | Benefits: |
|---|---|
| Remove existing hardware | Ensures a clean and consistent finish |
| Disassemble if necessary | Better coverage and access to tight corners |
| Protect the surrounding area | Prevents accidental damage and simplifies cleanup |
| Smooth the surface | Creates a smooth canvas for paint adhesion |
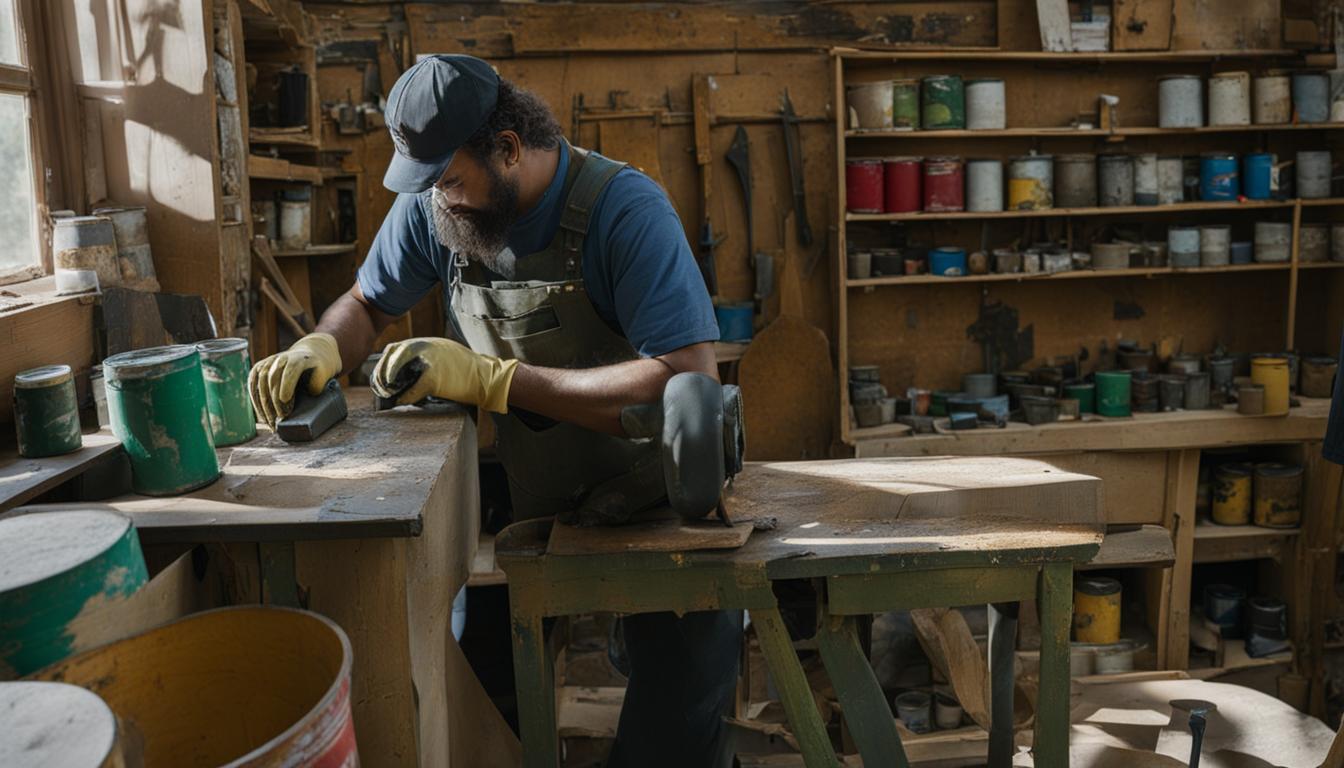
Preparation Tips for Painting Wood Furniture
Properly preparing your wood furniture for painting is essential to achieving a flawless and professional-looking finish. Here are some additional tips to ensure success:
- Clean the surface: Before sanding, ensure that the furniture’s surface is free from dust, dirt, and any other contaminants. Use a damp cloth to wipe down the entire piece and allow it to dry completely before sanding.
- Fill any imperfections: If your furniture has dents, scratches, or other blemishes, consider using wood filler to repair them. Follow the product instructions to apply the filler and allow it to dry before sanding.
- Use anti-vibration gloves: When sanding, protect your hands by wearing anti-vibration gloves. These gloves not only provide comfort but also reduce the risk of developing hand-arm vibration syndrome from prolonged sanding.
Remember, proper preparation is key to achieving a professional finish when refinishing wood furniture with paint. Taking the time to follow these tips will ensure that your furniture is ready for the next steps in the refinishing process.
Priming the Wood Furniture
Applying primer is a crucial step in refinishing wood furniture with paint. It helps create a smooth and durable surface, ensuring better adhesion and an even finish. Here’s a step-by-step tutorial on priming your wood furniture:
- Clean the furniture: Before priming, make sure the surface is free from dust, dirt, and any residual finish. Use a damp cloth or tack cloth to wipe down the furniture.
- Choose the right primer: Select a primer that is suitable for your furniture type and the paint you intend to use. Oil-based primers are generally recommended for wood furniture.
- Prepare the primer: Stir the primer thoroughly to ensure it is well-mixed. If necessary, thin the primer according to the manufacturer’s instructions.
- Apply the primer: Use a high-quality brush or roller to apply an even coat of primer to the furniture, following the wood grain. Make sure to cover all surfaces, including the corners and edges.
- Sand between coats: Once the first coat of primer is dry, lightly sand the surface with fine-grit sandpaper. This helps smooth out any imperfections and promotes better adhesion for subsequent coats.
- Apply additional coats: Depending on the condition of your furniture and the desired finish, you may need to apply one or two additional coats of primer. Sand lightly between coats for optimal results.
- Allow drying time: Follow the drying time recommended by the primer manufacturer before proceeding to the next step. This typically ranges from 2-24 hours.
By priming your wood furniture before painting, you create a strong foundation for the paint to adhere to, ensuring a professional-looking and long-lasting finish.
Table: Recommended Primers for Wood Furniture
| Primer Brand | Type | Features |
|---|---|---|
| KILZ Original Interior Primer | Oil-based | – Excellent adhesion – Blocks stains – Fast-drying |
| Zinsser Bulls Eye 1-2-3 Primer | Water-based | – Versatile (suitable for various surfaces) – Low odor – Quick-drying |
| Rust-Oleum Zinsser Cover Stain Primer | Oil-based | – Superior stain-blocking – Great for hiding dark colors – Dries to a smooth finish |
Quote:
“Priming is an essential step in refinishing wood furniture. It provides a smooth and durable surface for the paint to adhere to, ensuring a professional finish that lasts.” – Woodworking Expert
Painting the Wood Furniture
Now that the primer is dry and the furniture is prepped, it’s time to start painting. Follow these tips for a successful painting process:
- Use a high-quality brush: A good brush will help you achieve a smooth and even finish. Choose a brush specifically designed for painting furniture.
- Apply thin coats: It’s better to apply multiple thin coats rather than one thick coat. This will help prevent drips and ensure even coverage.
- Follow drying times: Different paints have different drying times. Follow the instructions on the paint can for proper drying times between coats. This will help you achieve the best results.
- Sand between coats if necessary: If you notice any imperfections or rough spots after a coat has dried, lightly sand the surface with fine-grit sandpaper before applying the next coat.
Remember to take your time and pay attention to detail while painting. This will ensure a professional-looking finish that will last for years to come.
“A good brush and multiple thin coats will help achieve a smooth and even finish.”
Comparison of Different Paint Types
| Paint Type | Advantages | Disadvantages |
|---|---|---|
| Chalk Paint | – Easy to apply – Can create a distressed look – Minimal prep work required | – Limited color options – Requires a sealant for durability |
| Latex Paint | – Wide range of colors available – Durable finish – Easy to clean | – Longer drying time – Can show brush marks if not applied properly |
| Oil-Based Paint | – Provides a smooth and durable finish – Good for high-use furniture | – Longer drying time – Strong odor – Requires proper ventilation |
Consider your desired look, durability, and personal preferences when choosing the type of paint for your furniture.
Applying a Sealant
After painting your wood furniture, it’s essential to apply a sealant to protect the painted surface and enhance its longevity. There are various sealant options available, including wax and polyurethane, each offering different benefits and finishes. Choosing the right sealant will depend on the type of paint used and the desired appearance of the furniture.
If you opt for a wax sealant, it provides a more natural and matte finish, giving the furniture a softer look. It’s important to note that wax sealants may require periodic reapplication to maintain their protective properties. On the other hand, polyurethane sealants offer a durable and glossy finish, providing a tough protective layer against moisture, stains, and scratches. They generally require fewer touch-ups over time.
Pros and Cons of Wax Sealants
Table: Pros and Cons of Wax Sealants
| Pros | Cons |
|---|---|
| Provides a natural and matte finish | May require periodic reapplication |
| Enhances wood grain and texture | Can be less durable than polyurethane sealants |
| Easier to apply and buff | May darken lighter paint colors |
While wax sealants bring out the natural beauty of wood and are relatively easier to apply and buff, they may not offer the same level of protection as polyurethane sealants. However, if you prefer a more rustic or vintage look, wax sealants can be an excellent choice.
Pros and Cons of Polyurethane Sealants
Table: Pros and Cons of Polyurethane Sealants
| Pros | Cons |
|---|---|
| Provides a durable and glossy finish | Can give a plastic-like appearance |
| Offers excellent protection against moisture, stains, and scratches | May require more precise application |
| Less frequent reapplication needed | May slightly alter the color of the painted furniture |
Polyurethane sealants offer superior durability and protection against daily wear and tear. They can be ideal for high-use furniture or pieces that require extra resilience. However, some people find that the glossy finish of polyurethane sealants can give the furniture a more manufactured appearance.
Regardless of the sealant you choose, it’s essential to follow the manufacturer’s instructions for application and drying times. Allow the sealant to dry completely before using the furniture to ensure optimal protection and longevity.
Reassembling the Furniture
Once the paint and sealant are dry, it’s time to reassemble the furniture and complete the transformation. Before reattaching the hardware, consider updating it with new knobs or handles for a fresh and modern look. Alternatively, give the existing hardware a thorough cleaning to remove any built-up dirt or grime. Clean hardware not only enhances the overall appearance of the piece but also ensures smooth functionality.
When reassembling the furniture, refer to any photographs or notes taken during the disassembly process to ensure everything is returned to its original position. Take your time and handle the pieces carefully to avoid any accidental damage. Use a screwdriver to securely attach the hardware, making sure it is firmly in place.
Remember, the reassembling step is your final opportunity to make any adjustments and ensure the furniture is sturdy and functional. Test the drawers, doors, or any moving parts to ensure they open and close smoothly. If any adjustments are needed, make them before moving the furniture back into its intended space.
“Reassembling the furniture is the exciting final step in the refinishing process. It’s the moment when all the hard work pays off, and you can see your transformed piece come back to life. Take your time and pay attention to detail to ensure a flawless finish.”

Table: Reassembling Tips
| Tip | Description |
|---|---|
| Take photos during disassembly | Capture images of the furniture before disassembling it to easily reference during reassembly. |
| Clean hardware | Give existing hardware a thorough cleaning or consider updating it for a refreshed look. |
| Handle pieces carefully | Avoid accidental damage by handling the furniture and hardware with care. |
| Securely attach hardware | Use a screwdriver to securely attach hardware, ensuring it is firmly in place. |
| Test functionality | Test drawers, doors, or any moving parts to ensure smooth functionality. |
By following these tips and taking the time to reassemble your furniture properly, you can admire the final result of your refinishing project. Whether you’re refinishing a family heirloom or giving new life to a thrifted find, the reassembling step is crucial for ensuring the longevity and functionality of your piece.
Drying Time for Painted Furniture
When refinishing wood furniture with paint, it’s important to allow for sufficient drying time to ensure a durable and long-lasting finish. While the paint may feel dry to the touch after a few hours, it takes additional time for the paint to fully cure and harden. Rushing the process and using the furniture before it’s fully cured can result in smudges, scratches, or a less resilient finish. Therefore, it’s essential to follow the recommended curing time on the paint can, which can vary depending on the type of paint used and environmental conditions.
Typically, latex or water-based paints require around one to two weeks to fully cure, while oil-based paints may take longer, sometimes up to a month. The curing time is influenced by factors such as temperature, humidity levels, and ventilation. Higher temperatures and lower humidity tend to speed up the curing process, while lower temperatures and higher humidity can delay it. To ensure optimal curing, it’s best to avoid painting in extreme temperatures or high humidity conditions.
During the curing process, it’s important to handle the furniture with care and avoid placing objects or heavy items on it. Give the painted surface ample time to harden and strengthen before subjecting it to regular use. By allowing for the proper drying and curing time, you can ensure that your painted wood furniture retains its beauty and durability for years to come.
Table: Average Drying and Curing Time for Different Types of Paint
| Type of Paint | Average Drying Time | Average Curing Time |
|---|---|---|
| Latex or Water-based | 2-4 hours (dry to touch) | 1-2 weeks |
| Oil-based | 8-24 hours (dry to touch) | Up to 1 month |
Note: The drying and curing times mentioned above are approximate and can vary depending on several factors. Always refer to the manufacturer’s instructions on the paint can for specific recommendations.
By allowing for adequate drying and curing time, you can ensure that your painted furniture not only looks beautiful but also stands the test of time. Patience during this crucial phase of the refinishing process will reward you with a professionally finished piece that can be enjoyed for years to come.
Ideal Time for Furniture Painting
When it comes to refinishing wood furniture with paint, choosing the ideal time for your project can make a significant difference in the quality and longevity of the finish. While you can paint furniture all year round, it’s important to consider weather conditions and other factors that can affect the outcome of your project.
One of the key factors to consider is the temperature. Painting furniture in extreme heat or cold can lead to issues such as paint drying too quickly or not adhering properly. It’s best to choose a day when the temperature is between 50°F and 85°F for optimal results.
Another important factor is humidity. High humidity can cause paint to dry slowly, leading to prolonged curing times and potential issues with the finish. It’s recommended to paint furniture on a day when the humidity levels are between 40% and 70%.
Spring, summer, and fall are often considered ideal times for outdoor painting projects, as these seasons typically offer more moderate temperatures and lower humidity levels. However, if you’re painting indoors or have a controlled environment, you can paint furniture at any time of the year as long as the space is well-ventilated and the temperature and humidity levels are within the recommended range.
Mistakes to Avoid when Painting Wood Furniture
When refinishing wood furniture with paint, it’s important to avoid common mistakes that can lead to less-than-desirable results. By taking the time to properly prepare, prime, and paint your furniture, you can achieve a professional finish that will last for years to come. Here are some pitfalls to avoid:
- Rushing the process: One of the biggest mistakes people make when painting wood furniture is rushing through the process. It’s important to take your time, especially when it comes to sanding and applying multiple coats of paint. Rushing can result in an uneven finish or paint that doesn’t adhere properly.
- Applying thick coats of paint: While it may be tempting to apply a thick coat of paint to save time, this can lead to problems such as drips and brush marks. Instead, apply thin, even coats and allow each coat to dry completely before applying the next.
- Skipping priming and sealant: Primer is essential for creating a smooth, even surface for the paint to adhere to. Skipping this step can result in paint that doesn’t stick or chips easily. Additionally, applying a sealant can protect the painted surface from damage and add durability. Don’t skip these important steps.
By avoiding these common mistakes, you can ensure that your painted wood furniture looks beautiful and lasts for years to come. Take your time, follow the proper steps, and enjoy the process of transforming your old furniture into something new and stylish.

Expert Tip:
“When it comes to painting wood furniture, patience is key. Take your time, follow the steps, and don’t rush the process. It’s better to spend a little extra time on preparation and achieve a professional finish than to rush through and end up with a subpar result.”
| Mistake | Effects | Prevention |
|---|---|---|
| Rushing the process | Uneven finish, poor adhesion | Take your time, follow instructions |
| Applying thick coats of paint | Drips, brush marks | Apply thin, even coats |
| Skipping priming and sealant | Poor adhesion, lack of durability | Prime and seal before painting |
By keeping these common mistakes in mind and following the proper steps, you can achieve professional-looking results when painting wood furniture. Remember to be patient, take your time, and enjoy the process of transforming your furniture into something beautiful and unique.
Importance of Testing for Lead Paint
When undertaking a furniture refinishing project, it is crucial to prioritize safety and take necessary precautions. One fundamental step in this process is testing for lead paint, especially when working with older furniture. Lead paint was commonly used in the past, and its presence can pose significant health risks, particularly for children and pregnant women. To ensure a safe environment, it is essential to test for lead paint before starting any refinishing or painting work.
Testing for lead paint is a simple and affordable process. Lead testing kits are readily available in most hardware stores and can be purchased online as well. These kits come with clear instructions on how to use them effectively. It is important to follow these instructions precisely to ensure accurate results. The testing process typically involves swabbing the painted surface and waiting for a color change to indicate the presence of lead. If lead is detected, it is crucial to take appropriate precautions to minimize exposure.
Exposure to lead can have serious health effects, including developmental delays, learning disabilities, and behavioral problems in children. Pregnant women exposed to lead are also at risk of complications, including premature birth and low birth weight. By testing for lead paint before refinishing furniture, you can protect yourself and your loved ones from these potential health hazards.
Key Safety Precautions for Furniture Refinishing:
- Wear protective clothing, including gloves, goggles, and a mask, to protect yourself from debris and potential chemical exposure.
- Work in a well-ventilated area or use proper ventilation equipment to minimize the inhalation of dust or fumes.
- Contain and properly dispose of any debris, dust, or paint chips to prevent contamination.
- Clean any tools or surfaces that come into contact with lead paint thoroughly.
- If you are unsure about the presence of lead paint or have concerns about exposure, consult with a professional before proceeding with the refinishing project.
By prioritizing safety and taking the necessary precautions, you can enjoy the process of refinishing furniture while ensuring the well-being of yourself and your family. Testing for lead paint is a crucial step in this journey, enabling you to create a beautiful and safe environment in your home.
Table: Safety Precautions for Furniture Refinishing
| Safety Precautions | Description |
|---|---|
| Wear protective clothing | Use gloves, goggles, and a mask to shield yourself from debris and chemicals. |
| Work in a well-ventilated area | Minimize inhalation of dust and fumes by working in a properly ventilated space. |
| Contain and dispose of debris properly | Prevent contamination by containing and disposing of debris, dust, and paint chips appropriately. |
| Clean tools and surfaces | Thoroughly clean any tools or surfaces that come into contact with lead paint to avoid spreading contamination. |
| Consult with a professional | If unsure or concerned about lead paint exposure, seek advice from a professional refinishing expert. |
Conclusion
After following this step-by-step guide on how to refinish wood furniture with paint, you can transform your old pieces into beautiful and functional items. By gathering the necessary materials and carefully preparing the furniture, you set the foundation for a flawless finish. Applying primer and multiple thin coats of paint, followed by a sealant, ensures durability and longevity.
Remember to take your time and avoid common mistakes such as rushing the process or skipping important steps like priming and sealing. By following these guidelines, you can achieve professional-looking results and give your furniture a new lease on life.
In conclusion, refinishing wood furniture with paint allows you to update and modernize your home decor without breaking the bank. It’s a rewarding DIY project that can bring new life to old pieces. So go ahead and enjoy the process of transforming your furniture into something beautiful and functional. Happy refinishing!
FAQ
What materials do I need for refinishing wood furniture?
You will need a screwdriver, plastic bag, drop cloth, palm sander, sandpaper, anti-vibration gloves, tack cloth, primer, paint, paintbrush, and sealant. The specific type of paint and finish will depend on your desired aesthetic and use of the furniture.
How do I prepare the furniture for painting?
Start by removing any existing hardware and placing it in a plastic bag. If needed, remove drawers to paint them separately. Lay down a drop cloth to protect the surrounding area. Use a palm sander and sandpaper to remove any existing finish and create a smooth surface.
Should I prime the wood furniture before painting?
Yes, applying one to two coats of primer is recommended. This helps the paint adhere properly and increases the durability of the finished piece. Sand lightly with fine-grit sandpaper between coats for better adhesion.
How do I paint the wood furniture?
Apply thin coats of paint using a high-quality brush. Follow the instructions on the paint can for drying times between coats. Sand lightly between coats if necessary. Multiple coats may be needed for better coverage and an even finish.
What should I use to seal the painted surface?
Choose a sealant that matches the type of paint used, such as wax or polyurethane. Apply the sealant according to the manufacturer’s instructions and allow it to dry completely before using the furniture.
How do I reassemble the furniture after painting?
Once the paint and sealant are dry, reattach the hardware to the furniture. Consider updating the hardware for a fresh look or give the existing hardware a thorough cleaning.
How long does the painted furniture need to cure?
Even after the paint is dry to the touch, it takes time for it to fully cure and harden. Follow the recommended curing time on the paint can before placing objects on the furniture. This can take up to a week or two.
When is the best time to paint furniture?
You can paint furniture all year round in a dry and well-ventilated space. However, it is best to avoid painting in extreme temperatures or high humidity. Spring, summer, and fall are often considered ideal times for outdoor painting projects.
What are some common mistakes to avoid when painting wood furniture?
Common mistakes to avoid include rushing the process, applying thick coats of paint, and skipping priming and sealant. Take your time, apply thin coats, and follow the proper steps for a professional finish.
Why is it important to test for lead paint before refinishing wood furniture?
Testing for lead paint is crucial, especially on older furniture. Lead testing kits are readily available and affordable. Follow the manufacturer’s instructions to ensure your safety during the refinishing process.